A Comprehensive Guide: How to Installing and Configuring Apache on Ubuntu

Prerequisites
Before you begin, make sure you have the following in place:
- An Ubuntu 22.04 server set up with a non-root user that has sudo privileges.
- And a good internet connection.
Once these prerequisites are met, log in as your non-root user and proceed with the installation.
Step 1: Installing Apache
Apache is readily available in Ubuntu’s default software repositories, making installation a breeze. Start by updating your local package index to ensure you have the latest package information:
sudo apt update
Now, install the apache2 package:
sudo apt install apache2
Upon confirmation, apt will install Apache and all its necessary dependencies.
Step 2: Adjusting the Firewall
Before testing Apache, we need to configure the firewall to allow outside access to the default web ports. Apache registers itself with UFW (Uncomplicated Firewall) during installation, providing application profiles to control access. You can list these profiles with:
sudo ufw app list
The output will show available profiles, including:
Apache: Opens only port 80 for normal, unencrypted web traffic.Apache Full: Opens both port 80 and port 443 for TLS/SSL encrypted traffic.Apache Secure: Opens only port 443 for TLS/SSL encrypted traffic.
Output Like:
Available applications:
  Apache
  Apache Full
  Apache Secure
  CUPS
  Nginx Full
  Nginx HTTP
  Nginx HTTPS
  OpenSSH
For this guide, we will allow traffic only on port 80:
sudo ufw allow 'Apache'
Verify the change with:
sudo ufw status
The output will list allowed HTTP traffic.
Output:
Status: active

To                         Action      From
--                         ------      ----
Nginx HTTP                 ALLOW       Anywhere
Apache                     ALLOW       Anywhere
22/tcp                     ALLOW       Anywhere
Nginx HTTP (v6)            ALLOW       Anywhere (v6)
Apache (v6)                ALLOW       Anywhere (v6)
22/tcp (v6)                ALLOW       Anywhere (v6)
Step 3: Checking Your Web Server
Ubuntu 22.04 starts Apache at the end of the installation. To ensure it’s up and running, use the following command for the systemd init system:
sudo systemctl status apache2
You should receive a status report indicating that the Apache service is active and running.
Output:
● apache2.service - The Apache HTTP Server
     Loaded: loaded (/lib/systemd/system/apache2.service; disabled; vendor pres>
     Active: active (running) since Wed 2023-10-18 15:41:15 +06; 2s ago
       Docs: https://httpd.apache.org/docs/2.4/
    Process: 62070 ExecStart=/usr/sbin/apachectl start (code=exited, status=0/S>
   Main PID: 62074 (apache2)
      Tasks: 8 (limit: 18925)
     Memory: 23.5M
        CPU: 59ms
     CGroup: /system.slice/apache2.service
             ├─62074 /usr/sbin/apache2 -k start
             ├─62076 /usr/sbin/apache2 -k start
             ├─62079 /usr/sbin/apache2 -k start
             ├─62080 /usr/sbin/apache2 -k start
             ├─62081 /usr/sbin/apache2 -k start
             ├─62082 /usr/sbin/apache2 -k start
             ├─62083 /usr/sbin/apache2 -k start
             └─62084 /usr/sbin/apache2 -k start

Oct 18 15:41:15 iqbalhasandev systemd[1]: Starting The Apache HTTP Server...
Oct 18 15:41:15 iqbalhasandev apachectl[62073]: AH00558: apache2: Could not rel>
Oct 18 15:41:15 iqbalhasandev systemd[1]: Started The Apache HTTP Server.
OR,
If Got status report indicating that the Apache service is inactive.
Output Like:
○ apache2.service - The Apache HTTP Server
     Loaded: loaded (/lib/systemd/system/apache2.service; disabled; vendor pres>
     Active: inactive (dead)
       Docs: https://httpd.apache.org/docs/2.4/
lines 1-4/4 (END)
Then run this command to active Apache service.
sudo systemctl start apache2 Now, access your server’s IP address in a web browser:
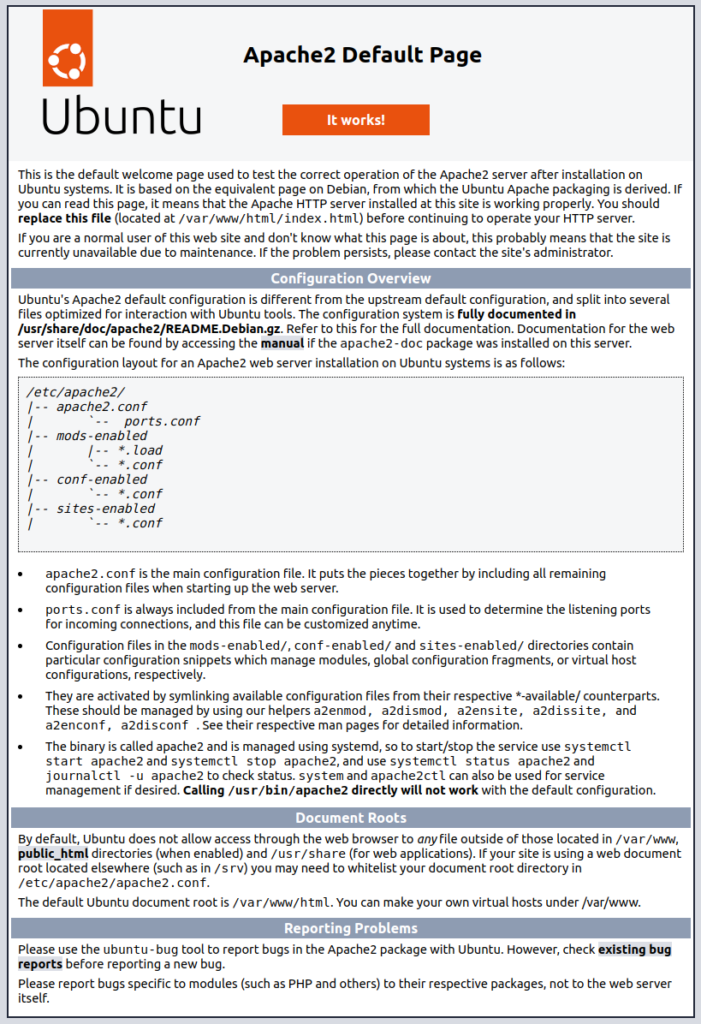
http://your_server_ip OR http://localhostYou should see the default Apache landing page, confirming that Apache is functioning correctly.

Step 4: Managing the Apache Process
Now that Apache is running, here are some basic management commands using systemctl:
- To stop the web server:
sudo systemctl stop apache2
To start it:
sudo systemctl start apache2
- To restart it:
sudo systemctl restart apache2- To reload without dropping connections:
sudo systemctl reload apache2
- To disable automatic startup at boot:
sudo systemctl disable apache2
- To re-enable automatic startup at boot:
sudo systemctl enable apache2
Apache will now start automatically when the server boots.
Step 5: Setting Up Virtual Hosts (Recommended)
Virtual hosts are essential when hosting multiple websites on the same server. This guide demonstrates how to set up a virtual host for a domain called your_domain. Replace this with your actual domain name.
Start by creating a directory for your domain:
sudo mkdir /var/www/your_domain
Assign ownership of the directory to your user:
sudo chown -R $USER:$USER /var/www/your_domain
Set the appropriate permissions:
sudo chmod -R 755 /var/www/your_domainCreate a sample index.html page:
sudo nano /var/www/your_domain/index.html
Add sample HTML content and save the file:
<html>
     <head>
          <title>Welcome to Your_domain!</title>
     </head>
     <body>
          <h1>Success! The your_domain virtual host is working!</h1>
     </body>
</html>
Create a virtual host configuration file:
sudo nano /etc/apache2/sites-available/your_domain.conf
Add the following configuration:
<VirtualHost *:80>
     ServerAdmin webmaster@localhost
     ServerName your_domain
     ServerAlias www.your_domain
     DocumentRoot /var/www/your_domain
     ErrorLog ${APACHE_LOG_DIR}/error.log
     CustomLog ${APACHE_LOG_DIR}/access.log combined
</VirtualHost>
Enable the new virtual host:
sudo a2ensite your_domain.conf
Disable the default site:
sudo a2dissite 000-default.conf
Test the configuration:
sudo apache2ctl configtest
Finally, restart Apache:
sudo systemctl restart apache2
Now, Apache will serve your domain. You can access it in a browser using:
http://your_server_ip OR http://localhost

Step 6: Getting Familiar with Important Apache Files and Directories
Here are some crucial directories and files within the Apache configuration:
Content:
/var/www/html: This is the web content directory where the default Apache page is served. You can change this directory by modifying Apache configuration files.
Server Configuration:
/etc/apache2: The main Apache configuration directory./etc/apache2/apache2.conf: The primary Apache configuration file that loads other configuration files./etc/apache2/ports.conf: Specifies the ports Apache listens on.
Server Logs:
/var/log/apache2/access.log: Records every request made to your web server./var/log/apache2/error.log: Logs all errors. The detail of error logs depends on the Log Level directive in the Apache configuration.
Conclusion
With Apache successfully installed and configured, you now have a powerful web server ready to host websites and applications. You can explore different content and technologies to create a rich web experience.
Happy web serving! 😉


